Brewing kombucha at home
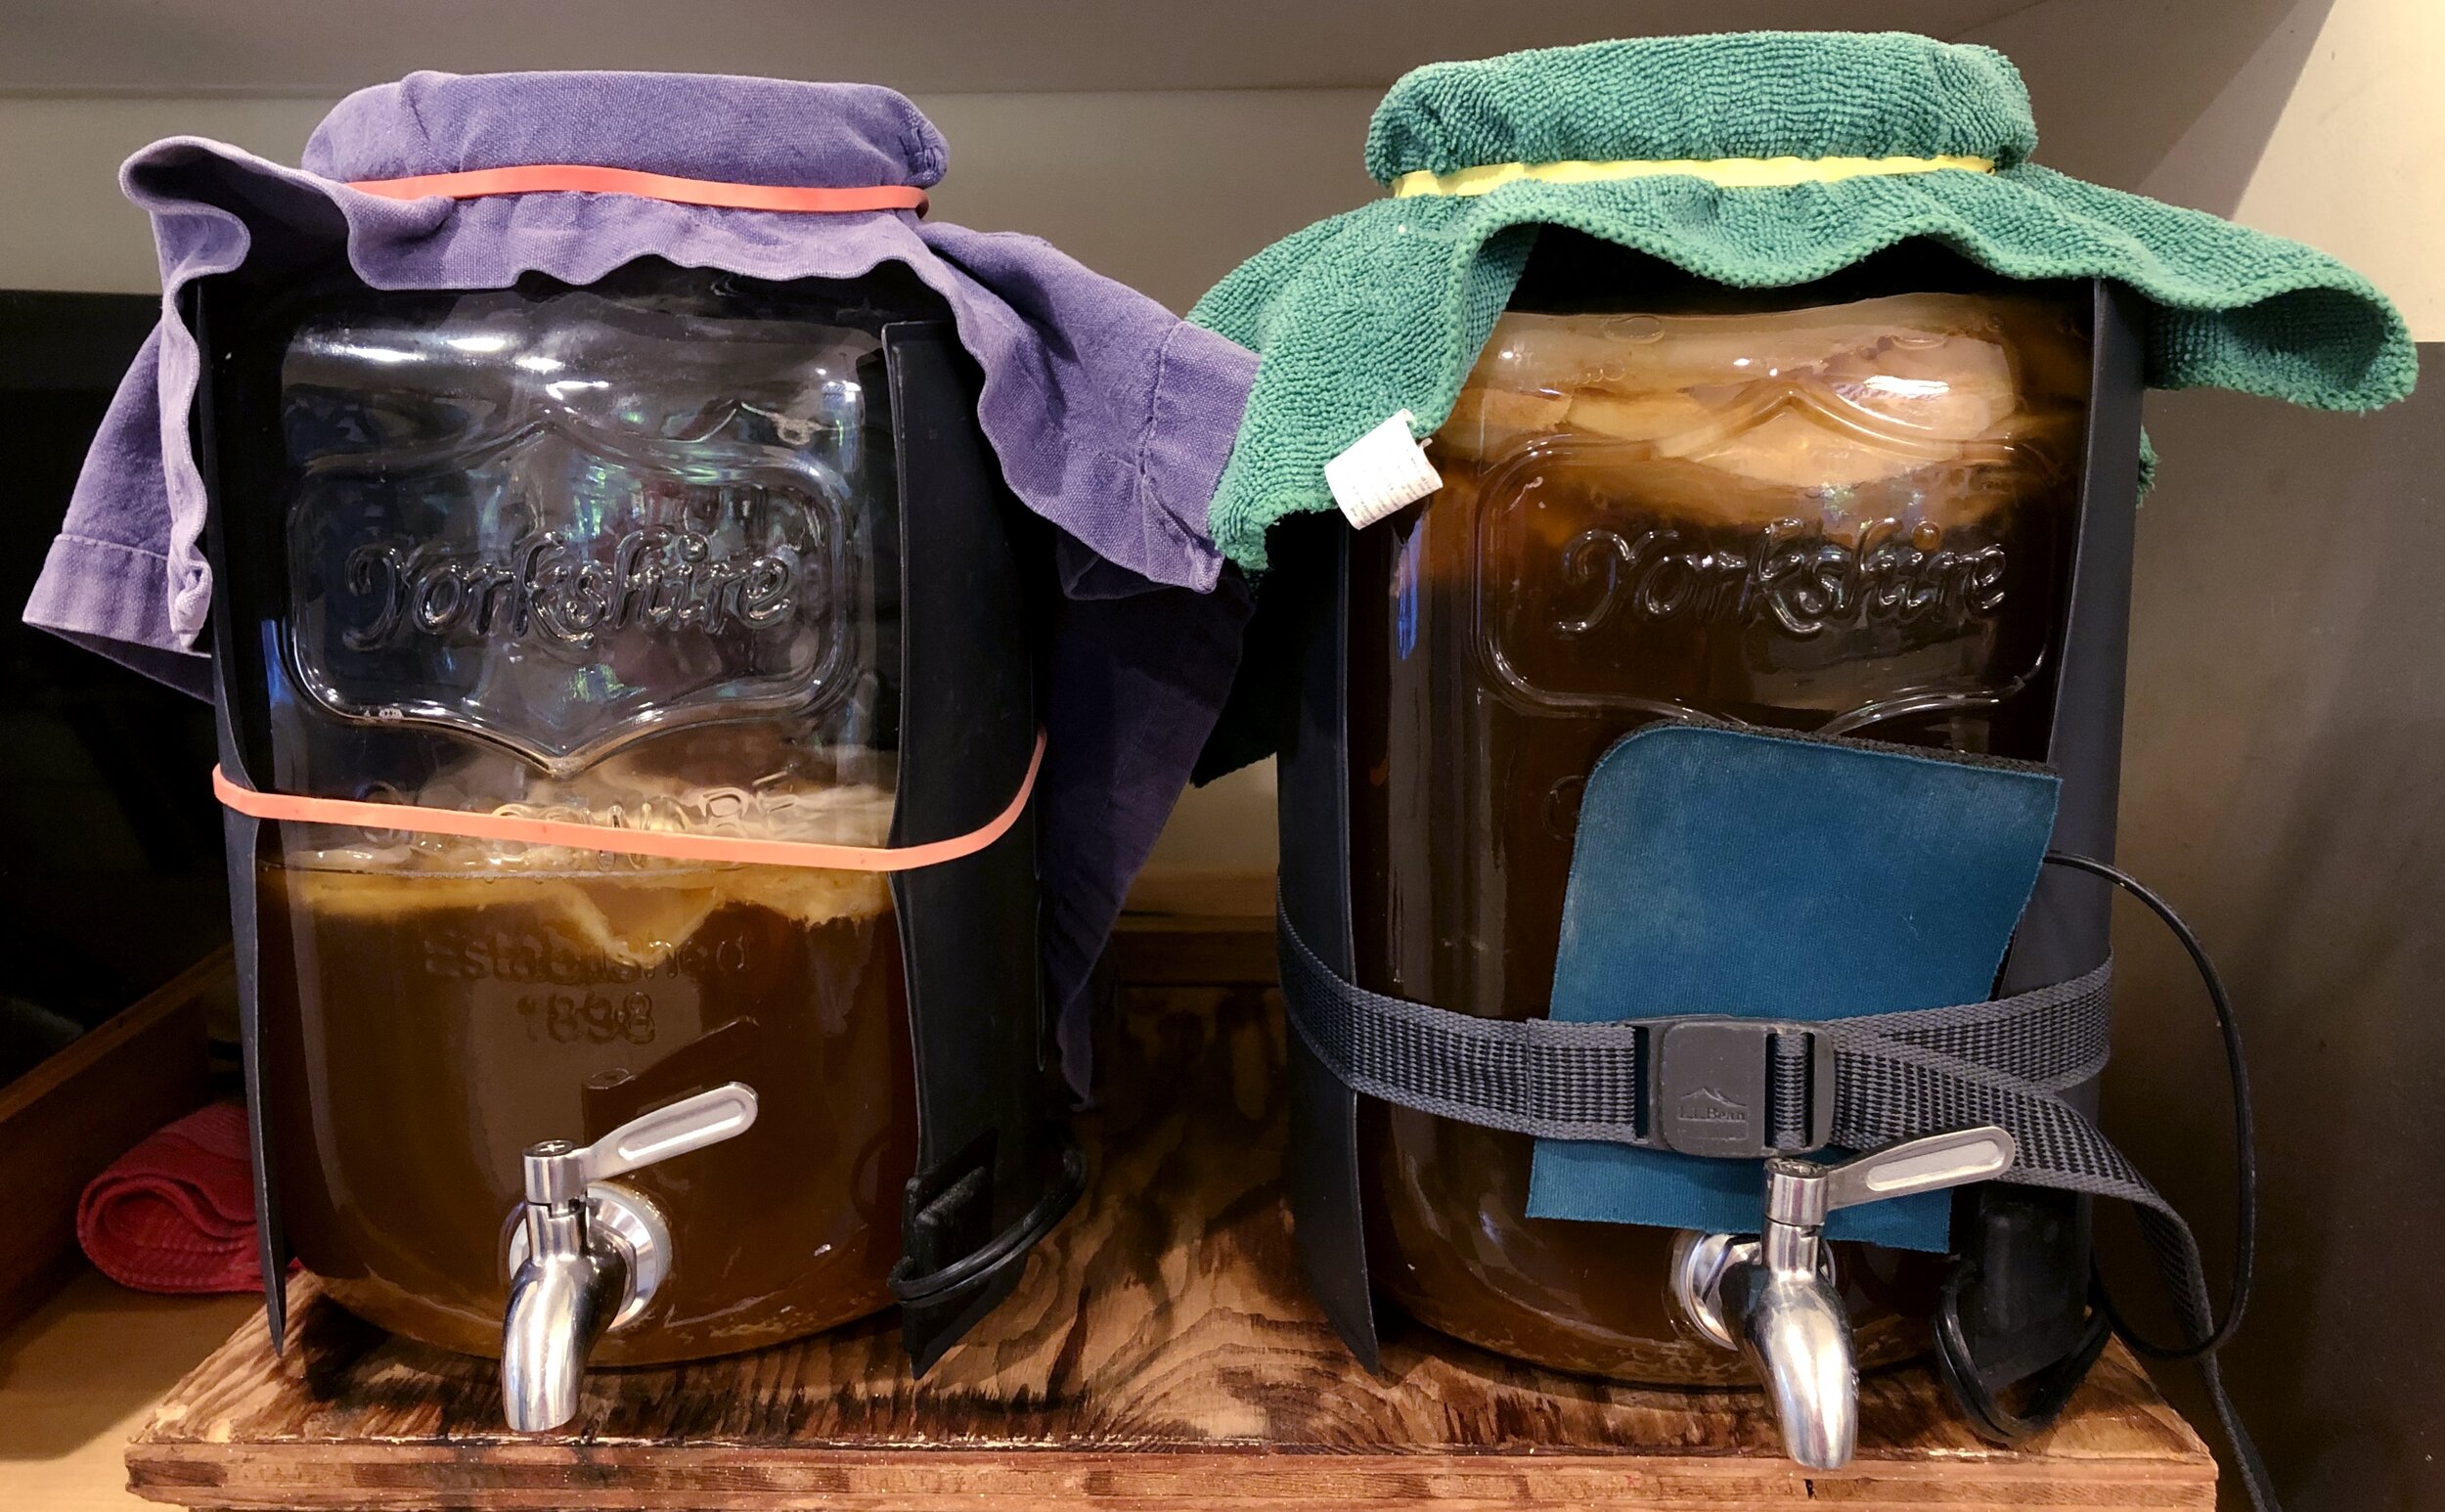
Home-brewed kombucha in the first stage of fermentation.
I learned to brew kombucha from my Dad, who discovered it on a trip to Portland, Maine. He took his first sip at a brewery there, and immediately knew he was onto something special. When he gets started on a project, it balloons into an obsession. Four years later, my parents’ house is full of glass bottles, books on fermentation, and burbling jars of kimchi, sauerkraut, and kefir.
“It never hurts to build a relationship with the things living inside of you. ”
When the pandemic hit, I found myself back home from college with my parents and their jars. I started working my way through the growing collection of books about fermentation. Brewing kombucha started as a way to kill time, but it evolved into something much better.
I found that having a shared activity with my Father made being home enjoyable; it gave us something to plan for and geek out about. It lent structure to our free time. We had the unusual experience of having to mop the ceiling after a geyser of potent avocado brew erupted from its bottle.
Waiting for a pandemic to end is passive and futile. Waiting for tea to turn into kombucha is active, and even exciting.
What is kombucha?
Kombucha is a fermented tea with a symbiotic culture of bacteria and yeast (SCOBY). Like other fermented foods, it contains living cultures that promote a healthy gut microbiome—the trillions of species living inside your intestines. It originated in China in the third century BC, and was introduced into Japan, then Russia and Eastern Europe. It became increasingly popular across Europe throughout the 20th century, but only recently became a staple in supermarkets across America.
Pear kombucha, in the second stage of fermentation. It will be a little sweet, with just a hint of pear flavor behind the tangy kombucha kick.
Kombucha has long been used medicinally, especially in China and Japan, to promote gut health and cure digestive problems. For the skeptics, there is increasing scientific evidence around the benefits of fermentation.
We know that the gut is alive, and needs to be fed. Eating fermented foods increases the diversity of the gut microbiome, which studies link to lowered rates of disease, such as obesity, diabetes, and metabolic disease. It may also fight inflammation, thus improving the immune system. Besides, it never hurts to build a relationship with the things living inside of you.
On top of all the benefits, it’s delicious and fun to make. You’ll undoubtedly get pulled into the fascinating science of fermentation as you experiment, and discover its unexpected poetry.
In The Art of Fermentation, Sandor Ellix Katz urges the reader to cultivate, along with the bacteria and fungus, a “consciousness of ourselves as coevolutionary beings, part of a greater web of life.” In a world full of antibiotics, we need to learn to nurture the microorganisms that coevolved with—and will outlive—all of us. I also recommend his more recent book, Fermentation as Metaphor, which reveals the physical beauty and symbolic power of the microscopic world of fermentation.
My experience with kombucha
For many, the idea of fermenting things at home seems dangerous; we’re afraid of growing “bad” bacteria. Bacteria, and the threats we associate with it (botulism comes to mind), are terrifying. But fermentation is a safe and ancient art. Once I started researching the history and science behind fermentation, I was hooked. Humans coevolved with trillions of species of bacteria, which already exist within our intestines, on our skin, and under our toenails. Bacteria allow us to survive.
“Kombucha is a living thing that requires continued attention and love.”
The process of fermenting something is an opportunity to learn more about the cultures with which we coexist.
Over the last few years, I have tasted more and more fermented foods—radish kimchi, kvass, various pickles, and vegan yogurts. I love kombucha, but I am not an expert. My Dad is not an expert. Sandor Katz, perhaps the best-known writer on fermentation, is a self-proclaimed non-expert. He collected wisdom from experience and passed it on. So did my Dad. And I, at the start of my fermentation journey, am doing the same.
Avocado and blueberry kombucha, just bottled, in the second stage of fermentation. They will be ready to drink in one to three days.
So how do you make it?
Making kombucha is easy because the SCOBY does all the hard work for you. The process includes two fermentation steps.
First, place the SCOBY in a sweet tea mixture and leave it to ferment for one to three weeks. Then, bottle and store it at room temperature to continue the fermentation process, and encourage carbonation. Finally, refrigerate it to maintain a relatively stable level of carbonation—otherwise, pressure will continue to build up in the bottle.
This is the recipe my Father uses, fine-tuned over several years with careful research and practice. Kombucha is a living thing that requires continued attention and love. If you want all the juicy details, I recommend The Big Book of Kombucha, by Hannah Crum and Alex LaGory.
FERMENTATION: PART ONE
You’ll need:
SCOBY (order one online, or get a chunk from a friend)
2-gallon vessel or jar
1 gallon of spring water or filtered tap water: If you don’t have a spring, you can filter tap water or cover it with a cloth and let it sit overnight so that the chlorine evaporates.
Evaporated cane sugar
A mixture of black and green tea (preferably fair trade)
White vinegar
pH test strips
Brewing from scratch:
Brew tea with about 2 cups of the filtered water: Add 4 black tea bags, let it cool for a moment and then add 2 green tea bags (green tea will turn bitter if put in boiling water). This is not a strict ratio; adjust to come up with the flavor you prefer). Let it steep for about 5 minutes.
Add 1 cup (200 g) of evaporated cane sugar. The yeast will eat most of the sugar.
Remove your tea bags. (And compost them.)
Mix the tea into the rest of the spring water, so you end up with 1 gallon of weak tea.
Add the SCOBY. The SCOBY is a disk of bacteria covered in filaments of brown yeast. If you’ve ordered it online, it will come in a sealed container with enough juice to feed it. Pour all the contents of the container into the gallon of tea. Now you have one gallon of very weak kombucha.
Pour into the fermentation container. Transfer the mixture into your preferred fermentation vessel with a spout, or dispenser, for easy tasting and bottling. A new SCOBY will form on top of the tea and grow to the edges of the vessel so it forms a film over the top.
Cover the vessel with a cloth to keep fruit flies, bugs, and dust from getting in. Make sure oxygen can get through.
Add a splash of distilled white vinegar to keep mold from developing. If mold forms, discard the brew and SCOBY and start fresh.
Let it sit. It will take one to three weeks (depending on temperature and karma) to achieve the perfect flavor and acidity. The ideal temperature is 75˚ - 85˚ F.
Keep tasting it every day. Within one to three weeks the sugar will mostly be gone, and the kombucha will be tart and lightly sweet. It is ready when you like the taste. Or you can test the acidity using pH strips. The ideal pH is between 2.5 and 3.5.
FERMENTATION: PART TWO
After one to three weeks of fermentation, once it tastes right and the pH is between 2.5 and 3.5, it’s time to bottle your kombucha!
Bottling is fun because you can use any juice you want to flavor it. You can buy or make your own, add chunks of fruit, herbs, vegetables, even flowers – it’s a creative choice. You can also drink it plain. In my experience using chunks or blended fruit creates a mushy build-up, so I prefer juice. My favorites include pear, mango, and ginger.
The sugar from the juice will feed the SCOBY, which will continue to ferment after bottling.
You’ll need:
1 packet (5 g) champagne yeast (ideally from a reputable, local brewing store)
A pinch of sugar
8 clean 16-oz bottles with tight-fitting lids. Flip tops work better than screw-on; it needs a very tight seal to build enough pressure to carbonate.
A funnel
Juice or pieces of fruit. This is optional. How much fruit, and what flavor is up to you, but I recommend starting with a classic, like ginger.
Bottling your brew:
Activate the yeast. Mix the yeast with a few teaspoons of warm water and a pinch of sugar. The sugar activates it. This does not need to be a precise process. Making it into a slurry makes it easy to mix in. Yeast isn’t necessary, but it does guarantee your kombucha will fizz nicely.
Bottle it. Pour kombucha from the big fermentation vessel into a jug or smaller container, and mix in the yeast slurry thoroughly. Put the bottles in the sink (in case of splashing) and funnel equal amounts of kombucha into each container.
If you want to flavor it, fill the rest of each bottle with juice, leaving an inch or two of space at the top. As the brew continues to ferment, pressure will rise inside the bottle, and it could overflow or explode if too full.
Burp your bottles daily. To check the levels of carbonation, open your bottles slightly every day. Keep up the practice; your brew could become explosive if you wait too long.
Wait a bit. It takes about one to three days for kombucha to finish fermenting.
When it’s ready, put the bottles in the fridge to stop the fermentation process. It can last one to three months in the fridge.
NOTE: Kombucha contains trace amounts of alcohol (typically below 0.5 per cent by volume) and caffeine.
My Dad keeps the process going continuously by brewing a new gallon of tea each time he bottles, and tasting the brew every day. It works best with ongoing nourishment, feeding it new tea and sugar every week or so. But it can last several months if you have to leave it. Just resume nourishment as soon as you can.
To share the SCOBY with a friend, just peel off a layer (they grow in layered disks on top of each other) and store it in a sugar-and-tea medium in a glass or ceramic vessel. You can start infinite new brews this way.

